Optimizing the File Size of a Word Document Exported from a PDF
During the process of converting an Adobe Acrobat PDF file to a Microsoft Word document, you may run into issues with large file sizes (over 5MB). The steps outlined below will help ensure you have a Word document that has an optimized file size and still displays well online.
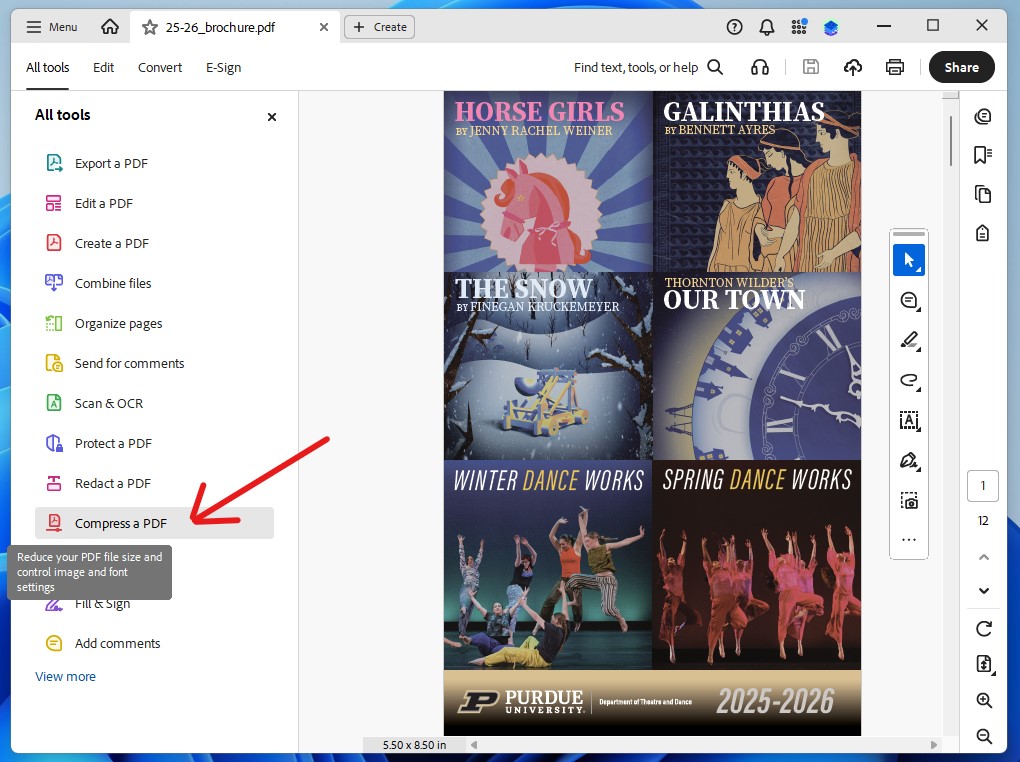
Step 1
With your PDF file open within Adobe Acrobat, click on "All tools" in the top menu bar and then select "Compress a PDF."
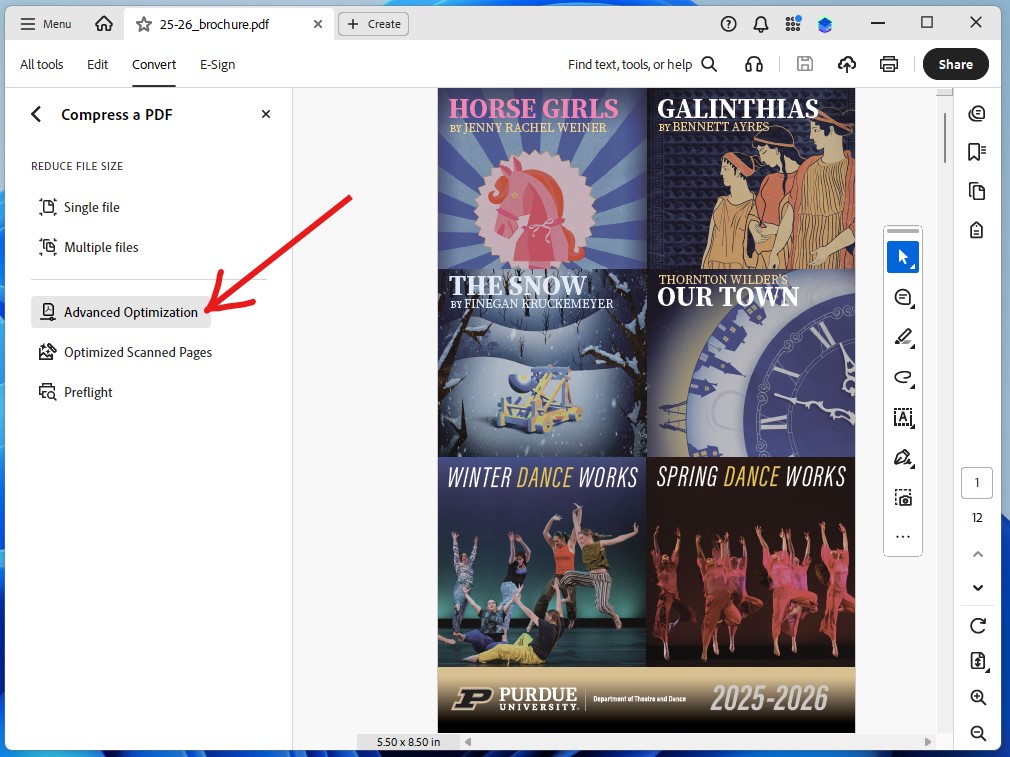
Step 2
Next, click on "Advanced Optimization." This is where you adjust settings that result in a reduced file size.
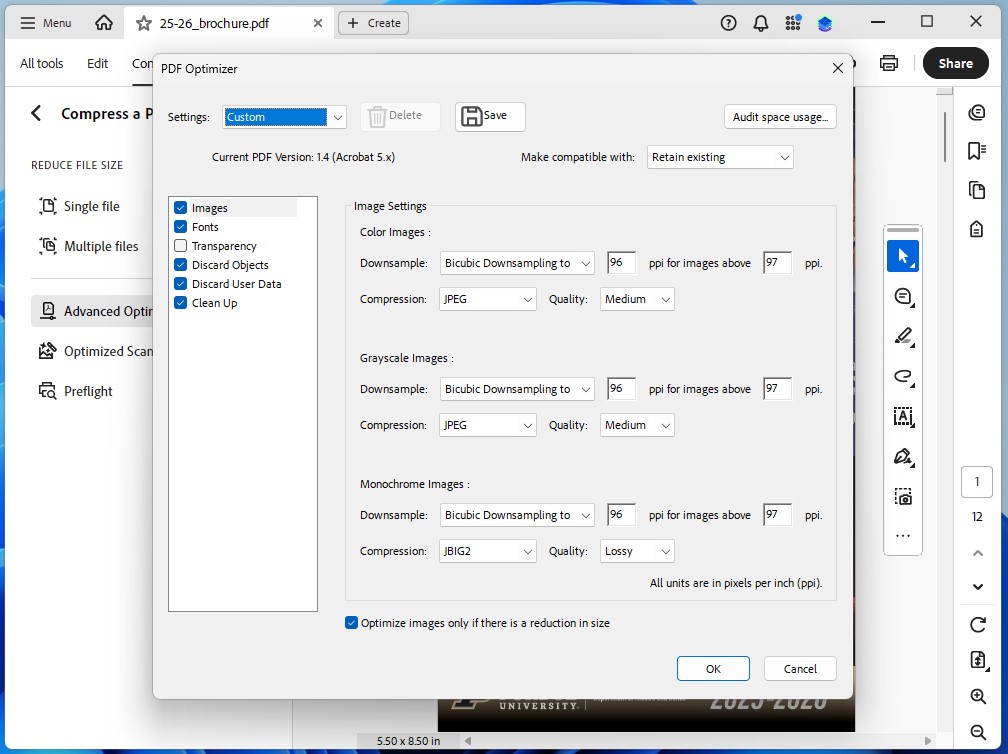
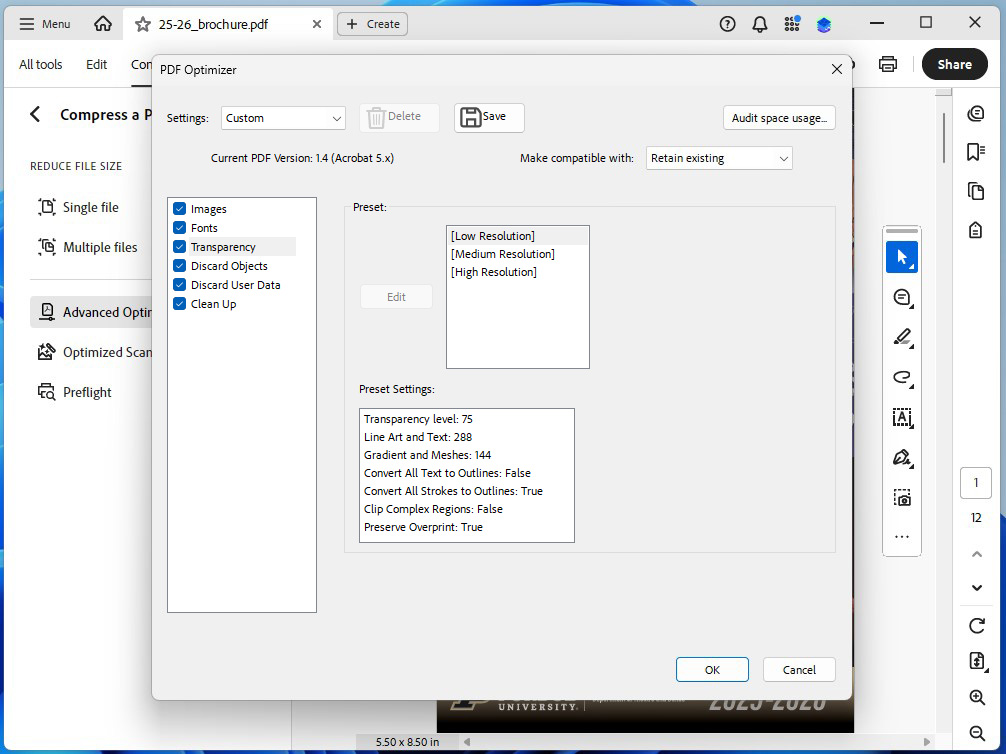
Step 3
On the "PDF Optimizer" window that opens, you will see six tabs you can customize. This screenshot shows the most important step of the whole process, which revolves around "Images."
Oftentimes, when a PDF file is made, images are added in a high quality setting for printing purposes. Online display doesn't need to be that high. Under the downsample (think compress here) images option, change this to 96 ppi (pixels per inch). Any image above that value will be downsampled. You can adjust the value to fit your desired level of quality. Remember a high value will increase your file size.
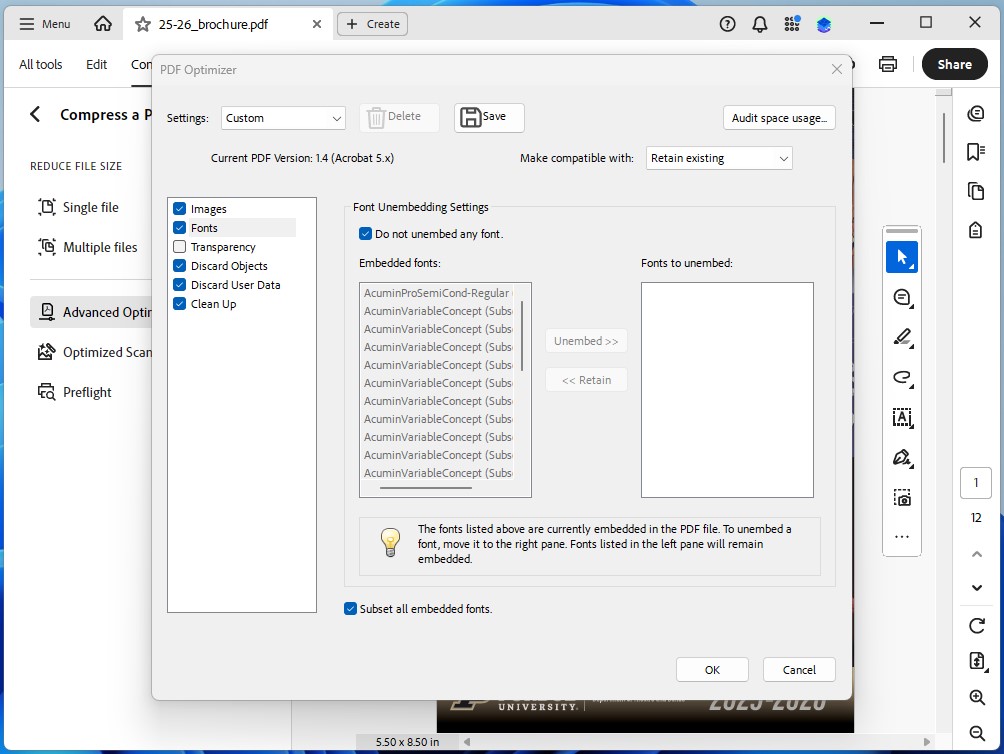
Step 4
The next tab down will involve the treatment of "Fonts." To maintain as much of the original layout as possible, do not unembed your fonts. While this would potentially result in some additional file size reduction, the tradeoff in document fidelity and quality might not be worth it.
Step 5
This step involves images with "Transparency" (usually coming from dropshadows or other filter effects). There are three options with "Low Resolution" resulting in the smallest file size. This could affect the quality of your document. Open the final PDF file and check to ensure it meets your quality standard. If not, adjust this value and try again.
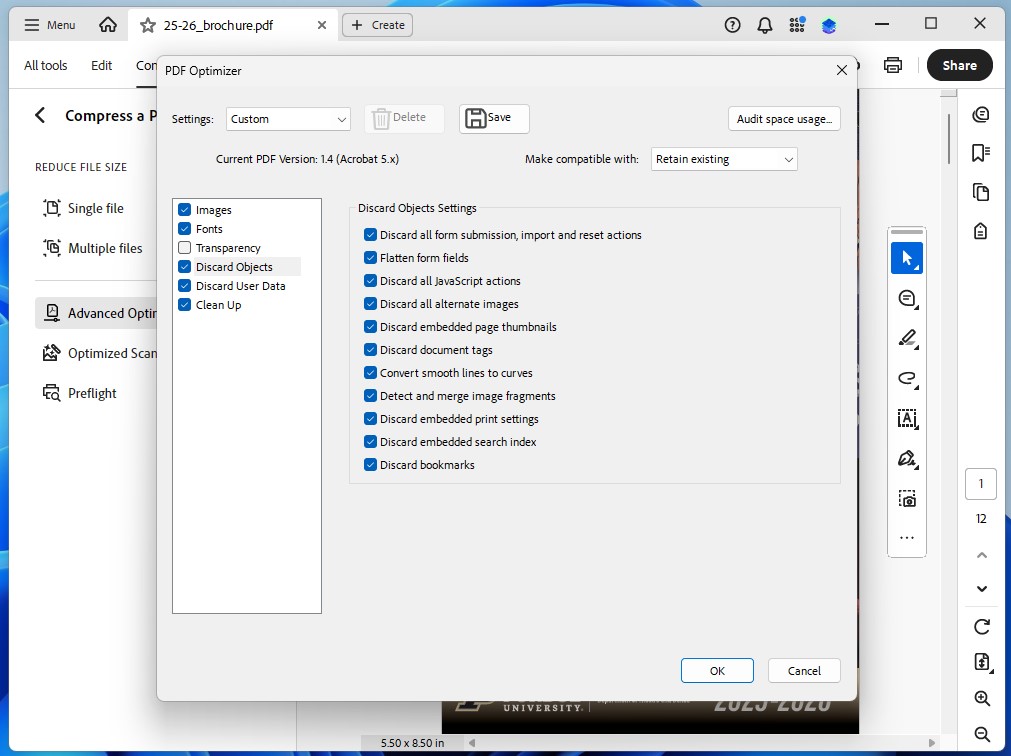
Step 6
On the "Discard Objects" tab has options that involve the way the PDF functions within Acrobat mainly. Since we are ultimately converting the resulting PDF to a Word document, these are not needed.
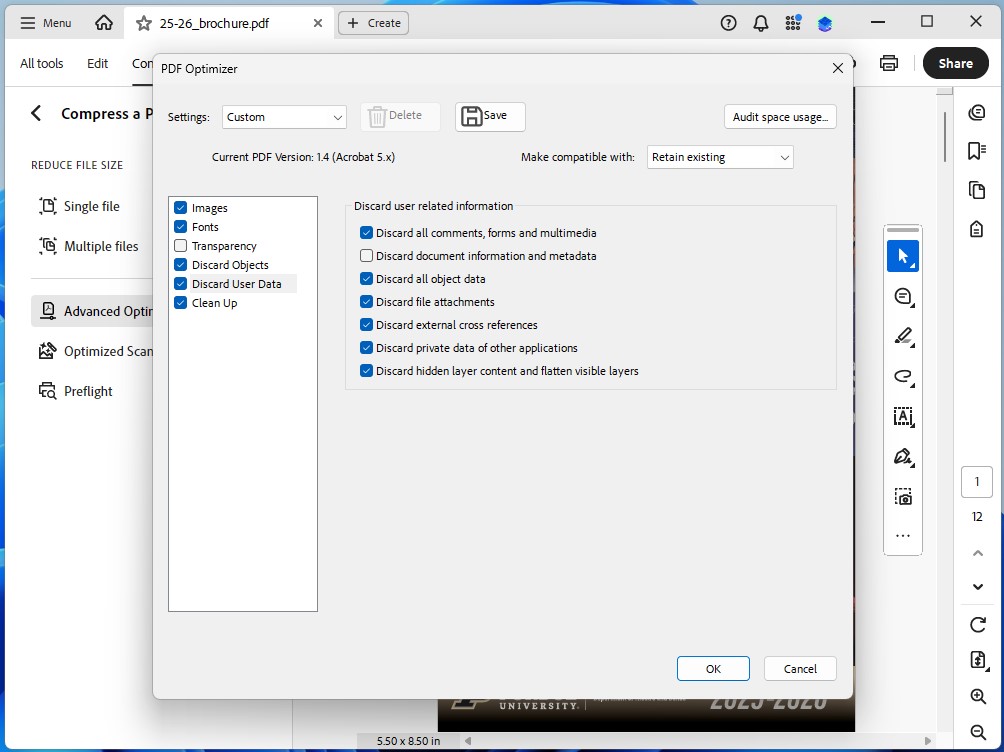
Step 7
The "Discard User Data" tab can mostly be left at its default values. If your PDF has a form, you may want to uncheck the first checkbox to keep that information. Uncheck "Discard document information and metadata" so this information comes over to the PDF file.
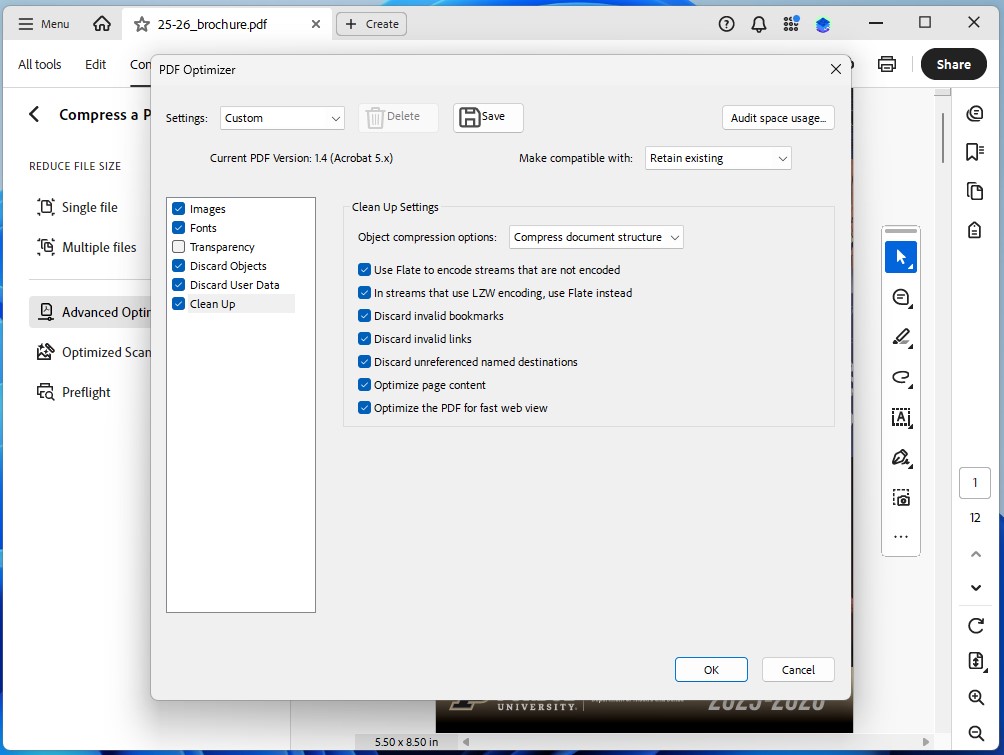
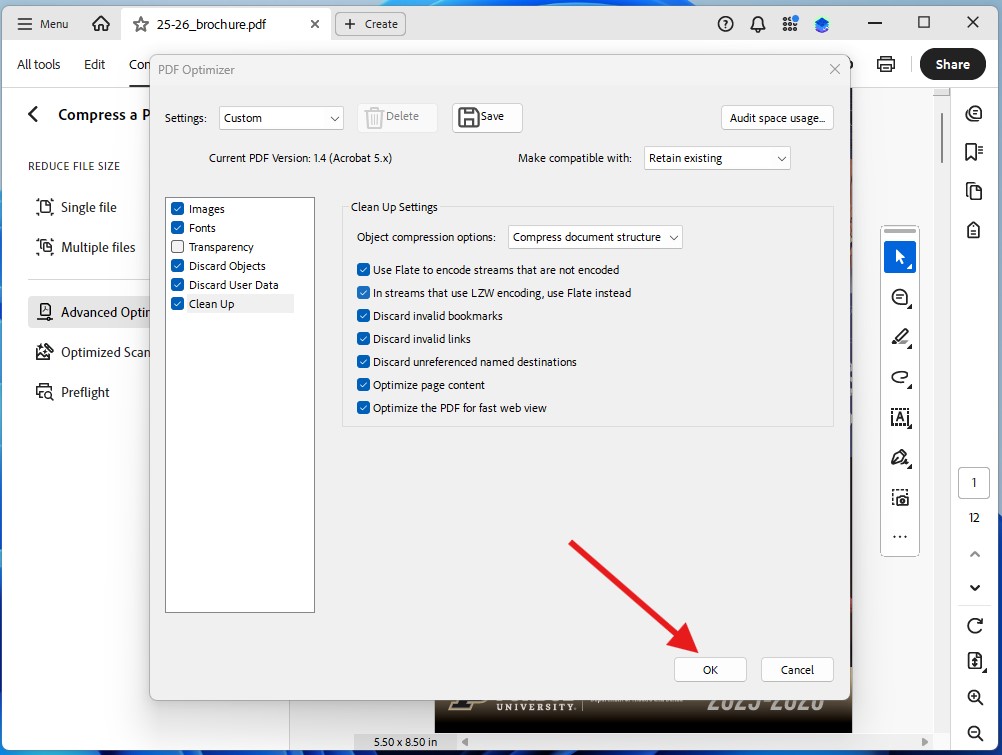
Step 8
The last tab before we get to click OK is for "Clean Up." Having all these checkboxes checked works well for most situations.
Step 9
Click the "OK" button.
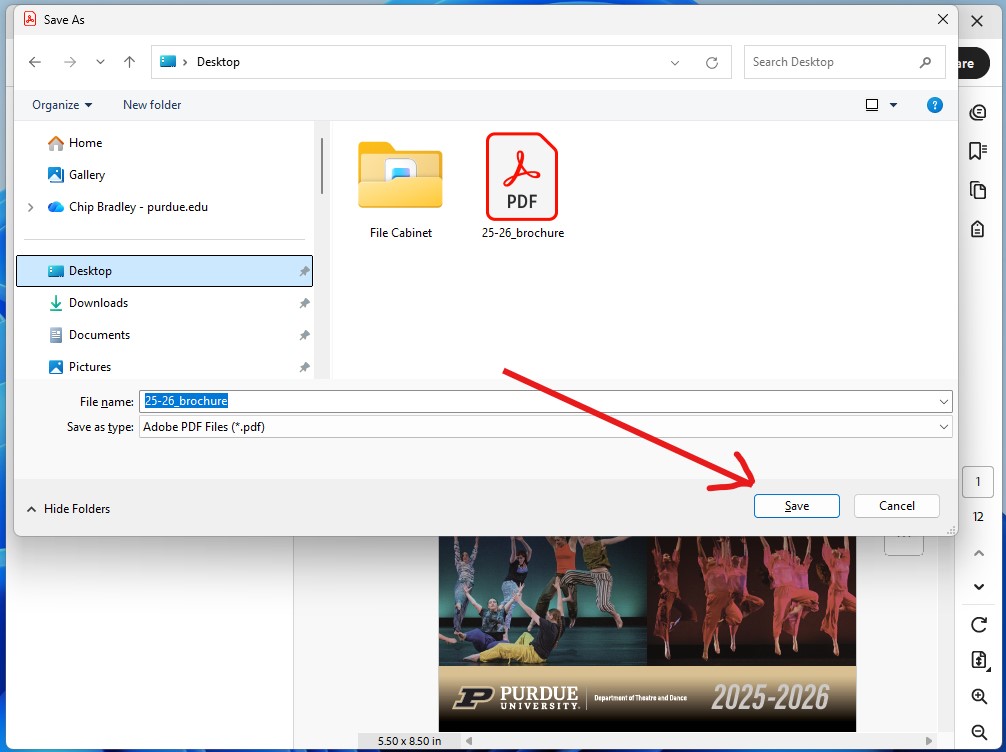
Step 10
After clicking "OK" in the step above, a window opens where you can select where to save the document (your computer, the Cloud, etc.) and give it a unique name. The resulting PDF file is the one you are going to convert to a Word document.
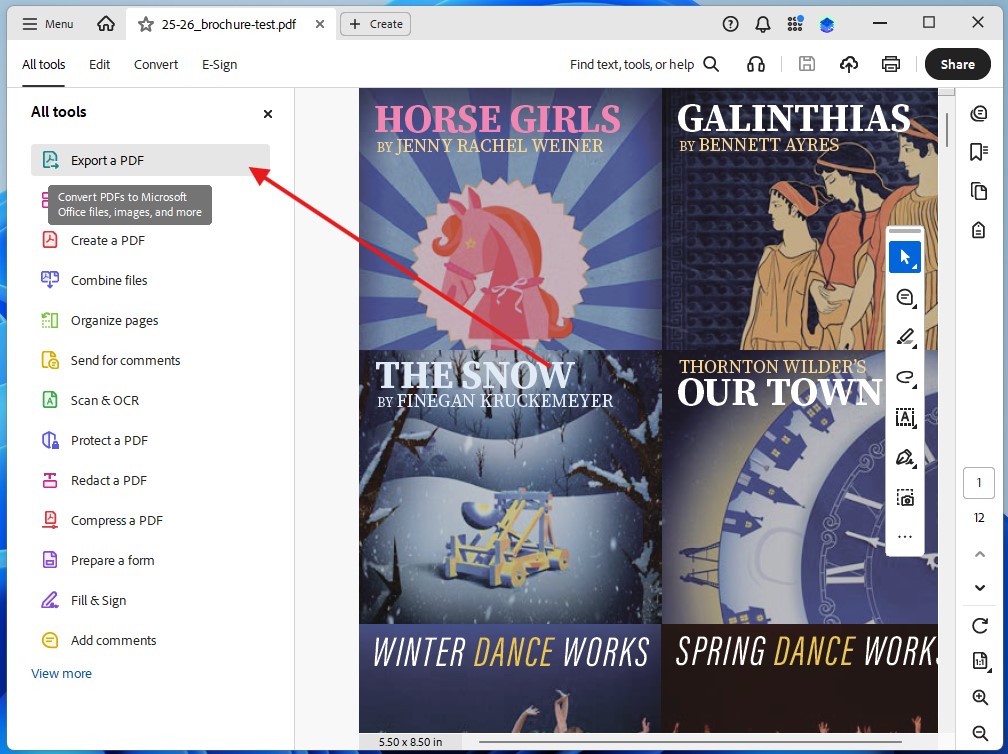
Step 11
Now, open the PDF file you just saved in the previous step. Click on "All tools" and then click on "Export a PDF."
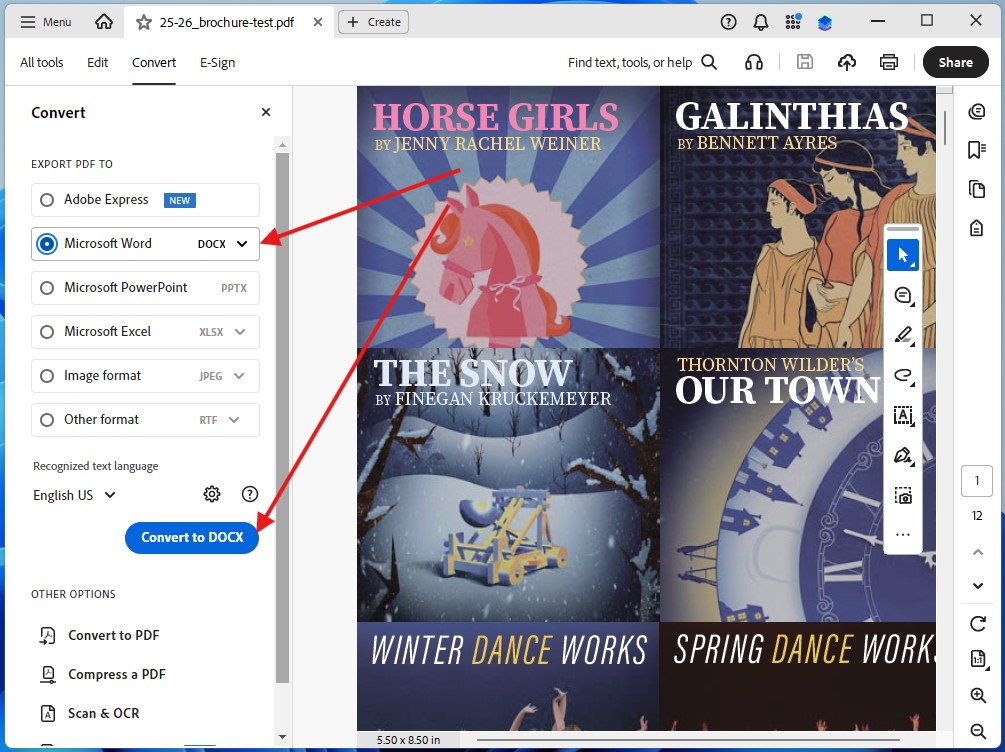
Step 12
Check "Microsoft Word DOCX" and then click on the "Convert to DOCX" button.
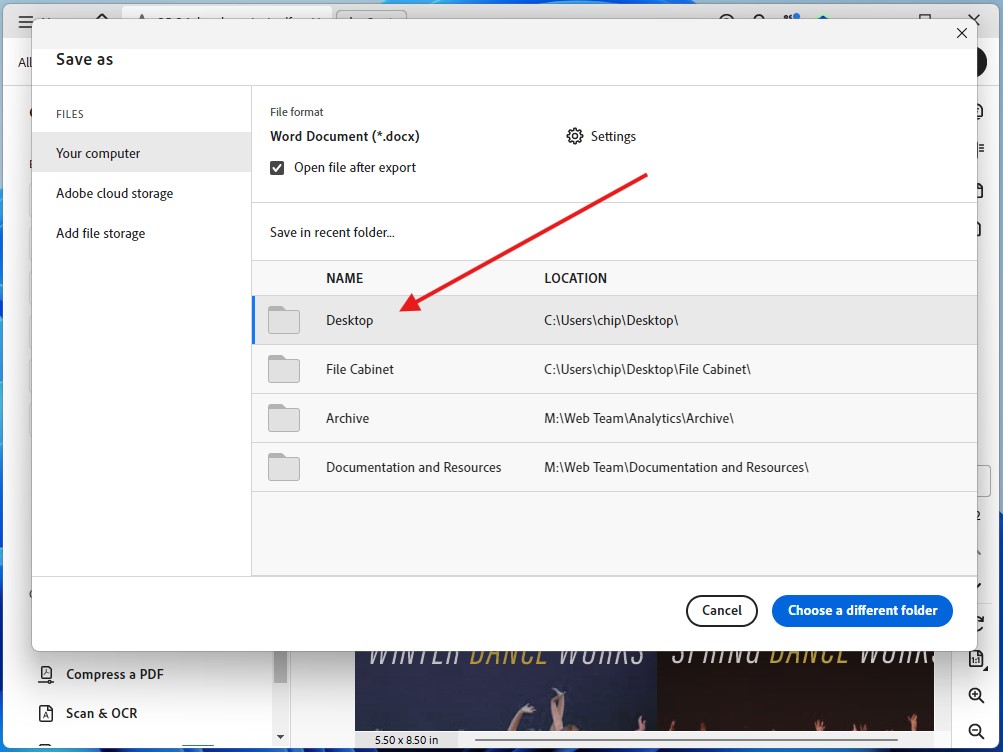
Step 13
Select where you want to save the file. I choose "Desktop" in this example.
Step 14
In the window that opens, you again have the option to select where you want to save the document (your computer, the Cloud, etc.) and give it a unique name. This is your optimized Word document. This is probably the smallest file size you can get your Word file without using special DOCX file compression programs.

Step 15
The resulting Word document will need to be checked for integrity and compared to the original PDF file. It is likely you will need to make some font or layout adjustments. At this point, you can click on "Review" in the top menu bar and then "Check Accessibility." Depending on your version of Word, the process may be different. In recent versions, the "Accessibility Assistant" side panel will open and guide you through the accessibility process.